
In my quest for the Holy Grail of portrait-retouching effects, I sought a look that was crisp and chiseled, yet sleek and refined. This couldn't be an ordinary effect; it had to be created nondestructively for maximum creative freedom, and it needed to add both drama and smoothness to a subject's skin. After years of searching and experimentation, I may have finally found it. In this tutorial, I'll share what I've discovered with you.
Step One: Open a Portrait File
Open a portrait that can benefit from more chiseled features and smoother skin.
â”CREDIT: ©BortN66/Shutterstock
Step Two: Create a Crisp Look
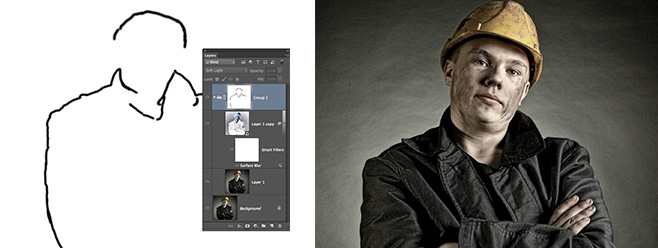
Press Command-J (PC: Ctrl-J) twice to create two duplicate layers. With the top layer active, Shift-click the layer below to select both layers. Press Command-G (PC: Ctrl-G) to add both layers to a group. At the top of the Layers panel, change the blend mode for the group to Soft Light.
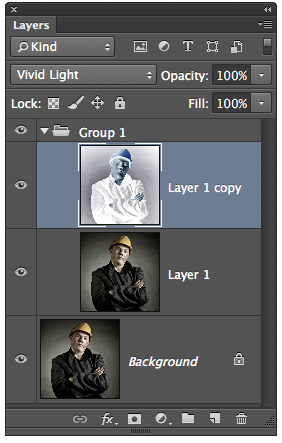
Twirl open the group by clicking the triangle icon. Activate the uppermost layer and change the blend mode to Vivid Light. Now press Command-I (PC: Ctrl-I) to temporarily restore the image to its original look.
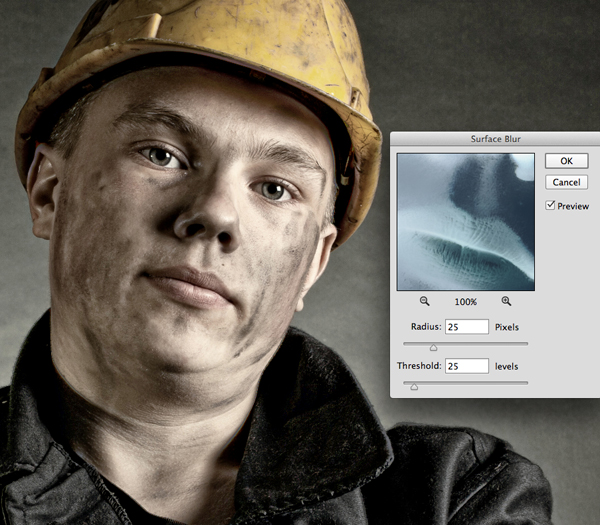
Choose Filter>Convert for Smart Filters, click OK in the dialog that appears, then Filter>Blur>Surface Blur. On a high-res file, set both the Radius and Threshold to around 25. Ironically, this blur enhances details. Click OK to close the Surface Blur dialog.
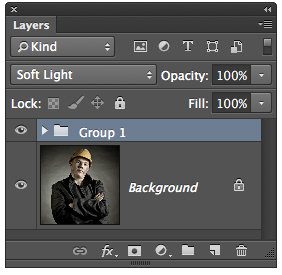
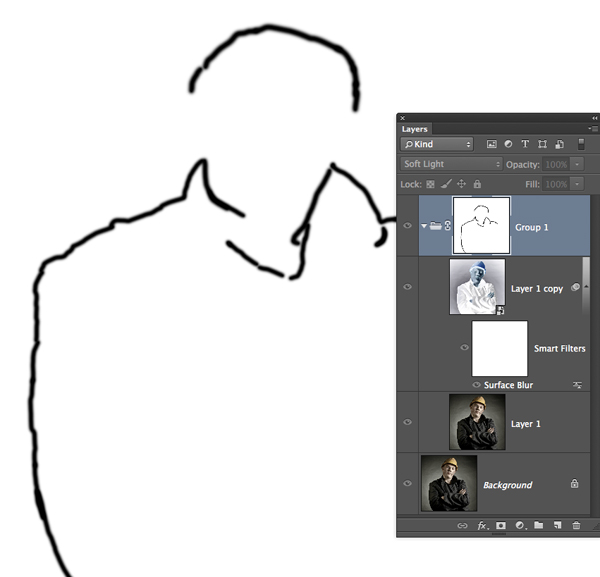
To selectively eliminate undesirable strong details or slight haloes, activate the group (Group 1) and click the Add Layer Mask icon (circle in a square) at the base of the Layers panel. Choose the Brush tool (B), press D then X to make the Foreground color black, and paint with a soft-edged brush over undesirable details or haloes. In this example, there are slight haloes in areas where very light tones meet very dark tones. To illustrate where I painted, I'm showing a screen grab of the mask.
Step Three: Blend Smooth Look with the Crisp Look to Produce a Sleek, Chiseled Look
With the group active, press Option (PC: Alt), and choose Layer>Merge Visible. Press Command-J (PC: Ctrl-J) to create a duplicate layer. Turn off visibility for the top layer and activate the layer below (Layer 2). Choose Filter>Convert for Smart Filters, and click OK in the resulting dialog. Now choose Filter>Noise>Reduce Noise. On a high-res image, set the Strength to 10 and all other sliders to 0. Click OK.
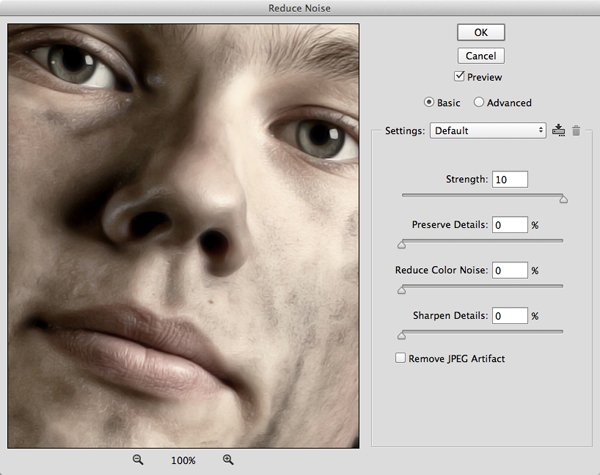
Choose Filter>Noise>Reduce Noise again. This time, set the Strength to 5 and leave the other sliders at 0. Click OK.
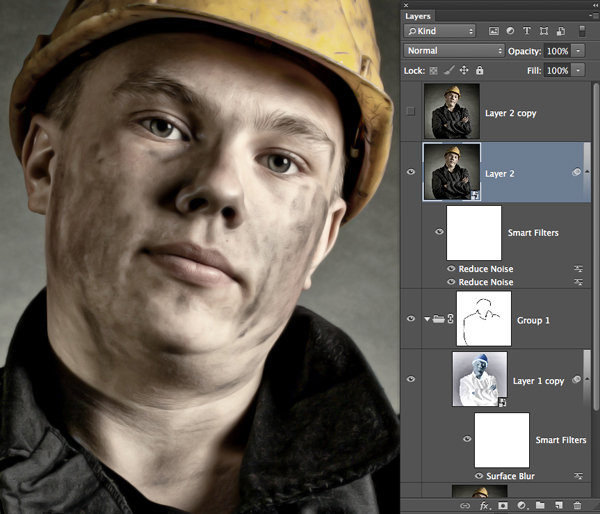
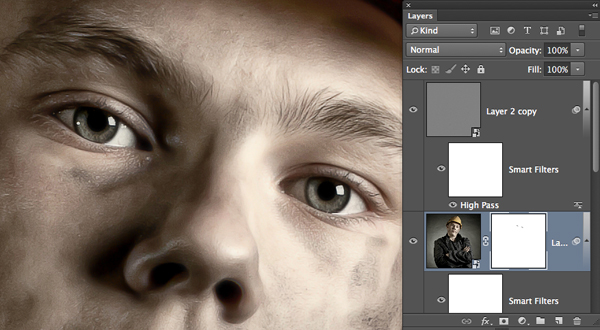
Application of the Reduce Noise filter tends to soften eyes, so we'll use two techniques to restore sharpness. Activate the top layer (Layer 2 copy) and switch on its visibility. Choose Filter>Convert for Smart Filters and click OK. From the Filter menu, select Other>High Pass. Set the Radius to 1 pixel and click OK. Change the blend mode to Overlay. Notice how this restores detail to edges, including the eyes.
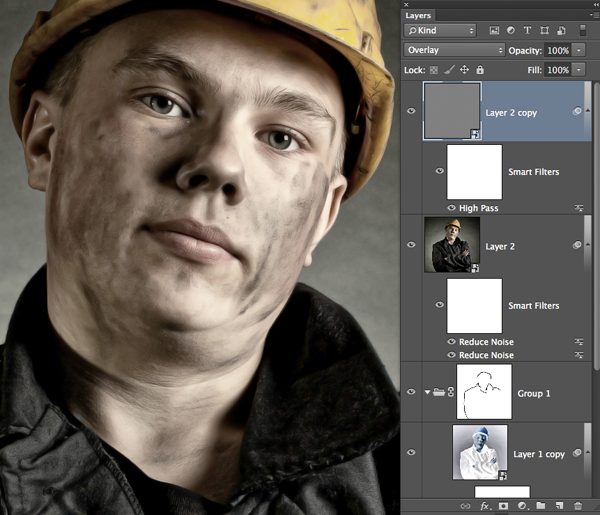
If the eyes need a little additional sharpening, activate the layer below (Layer 2) and click the Add Layer Mask icon. Using a soft-edged black brush at around 50% Opacity, paint over the eyes to restore more sharpness.
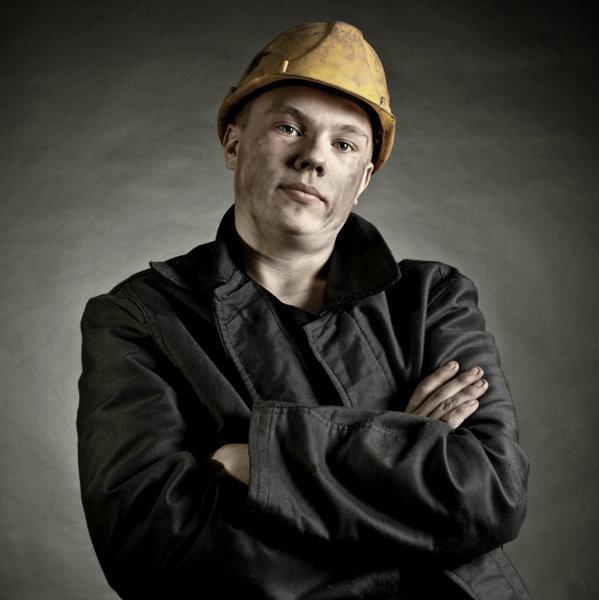
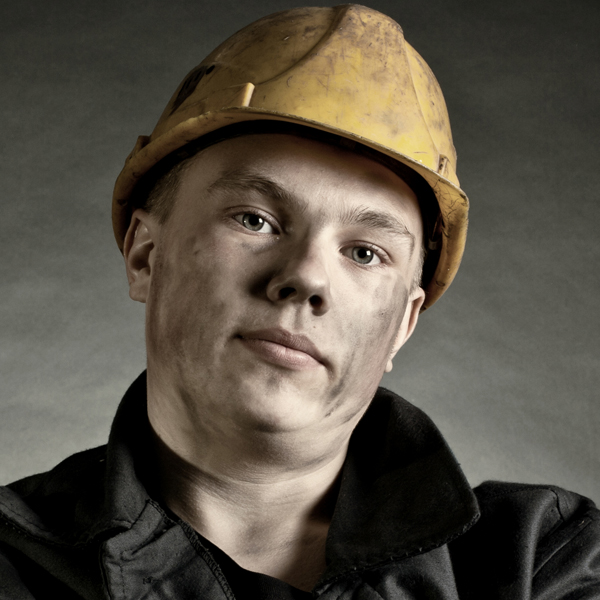
Here's the original image.
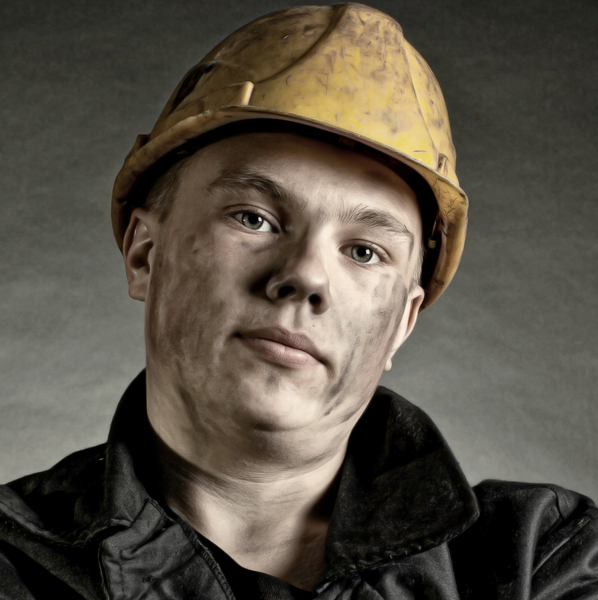
And here's the sleek, chiseled look.
Because all effects in this tutorial were created nondestructively, don't be afraid to go under the hood and tweak settings until you achieve the look you're after. To save time, keep in mind that you can record this effect as an action and play it back on other images. Have fun!
Mark S. Johnson Photography
msjphotography.com
