
Using an animated GIF, you can create scrolling text that can be viewed in any Web browser, without a plug-in. And it’s as easy as copying layers and editing a type block.
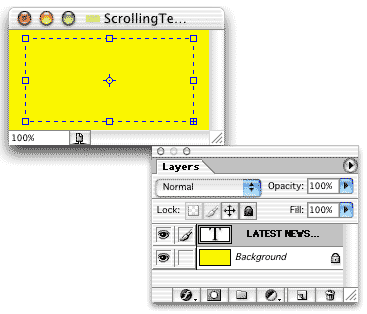
Start with a new document. Use the pixel size you want for the scrolling text box on your Web page. Make it RGB, fill it with white or your background color. Add a pattern or other background content. We’ll keep it simple.

Select the Type tool from the Toolbox. In the Options Bar, choose your font, size, color, and other options. Remember that sans serif fonts, such as Arial, look better in a Web browser than more complex fonts, such as Times.
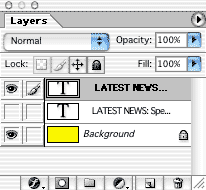
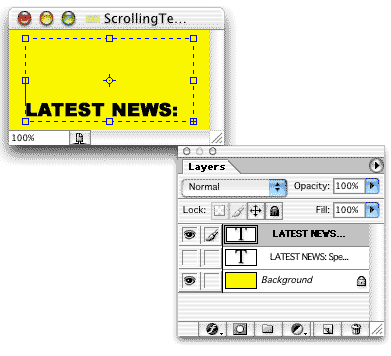
Drag the tool to create a rectangular text container. Using a text box (“area type”) rather than simply clicking the Type tool (“point type”) creates a text column. When your typing hits the edge of the box, a new line will start automatically – there’s no need to hit the Return/Enter key at the end of each line. And if you re-size the bounding box, the type automatically re-flows to match the new dimensions.
Type your message. Make sure that it runs longer than the height of your image, just so you have something to scroll.
TIP: In the Character palette menu, select the option No Breaks to prevent hyphenation.

When you type more content than fits in the type container, there will be a little symbol at the bottom of the bounding box. You can keep typing – even if it doesn’t show in the bounding box, the type is still being added. If you want to see the type, you can reposition the box in the window and drag the bottom of the bounding box downward to expand it.
Don’t get too carried away. If you try to write a scrolling book, you’re going to have a very large GIF file. Once the message is complete, move to the beginning of your text and add a bunch of returns, pushing the top line downward to the bottom of the image window. (The text isn’t being replaced, just moved downward in the bounding box.)
Now it’s time to make the layers that will serve as the frames of the animation:
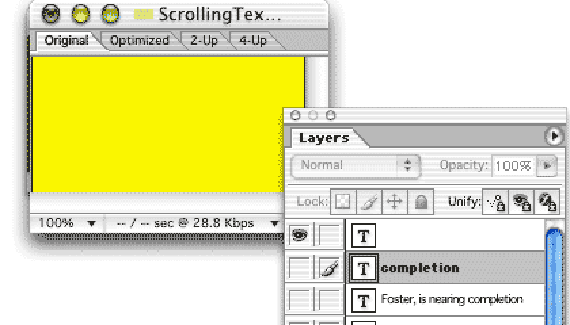
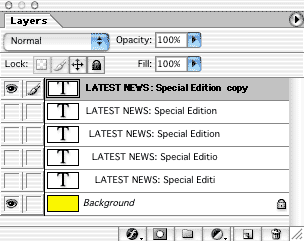
• Drag the type layer to the New Layer button at the bottom of the Layers Palette. This creates a duplicate. Click the eyeball icon to hide the original type layer.
• With the duplicate type layer active, position the Type tool just before the first word of your message and hit the Delete/Backspace key. That removes on of the extra Returns from above the type and moves the text up one line.
Repeat these steps, duplicating the most recent type layer, hiding the previous, moving the text up one line. After several repetitions, your Layers Palette should look something like this:
When your first test line reaches the top of the bounding box, continue making new layers, but delete an entire line of text from the top. Continue until you reach the end of the text. You can keep deleting lines from the top of the type container until your message “scrolls” right off the top of the image.
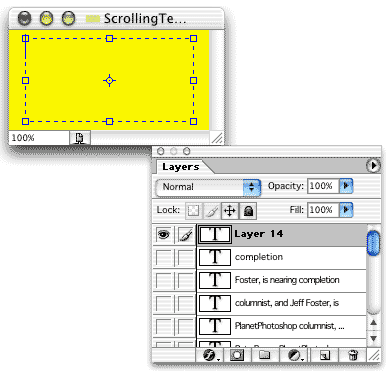
When you’ve got your layers copied and edited, jump to ImageReady. In ImageReady, you’ll be working with the Layers Palette and the Animation palette.
The process is this:
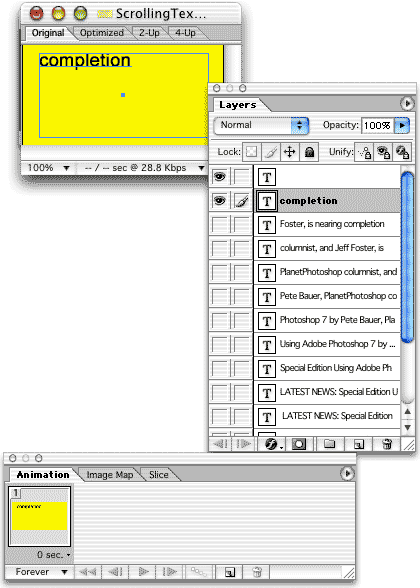
• Hide all the type layers, leaving just your background visible.
• Click the New Frame button in the Animation palette.
• Make the bottom type layer visible.
• Click the New Frame button.
• Hide the bottom type layer, make the next type layer visible.
• Click the New Frame button.
• Hide the current type layer, make the next higher type layer visible.
Continue until you have a frame for every type layer. Each frame should show only one type layer.
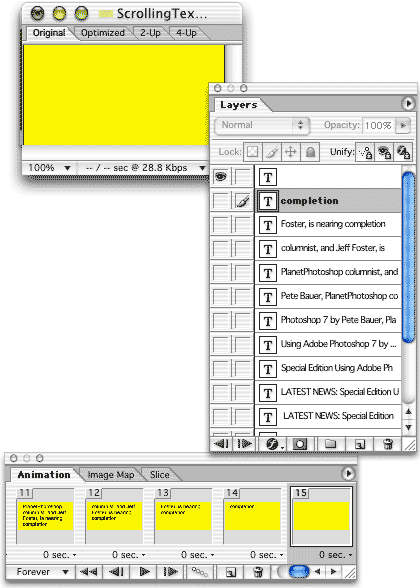
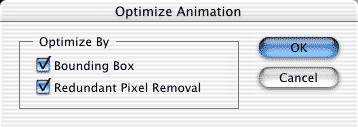
In the Animations palette menu, choose Optimize Animation and check the boxes for both Bounding Box and Redundant Pixel Removal.
From the Animation palette menu, choose Select All Frames. At the bottom of the Animation palette, click on the Timing pop-up menu and select something reasonable for your message frames. This is the delay between frames. Too short and no one can read the message as it flashes by; too long and the “scroll” becomes too jerky.
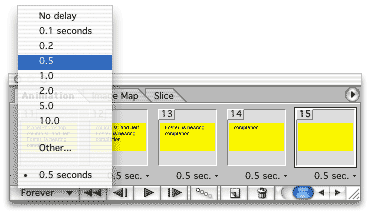
Test the speed by clicking the Play button. For narrow messages, just a word or a couple of words per line, consider using the Other option and 0.3 or 0.4 seconds per frame. Use the menu command File> Save Optimized As. Select a name and location and save the image.

TIPS:
• You can change the delay on an individual frame to make it hold on screen longer.
• Try duplicating a frame a couple of times and adding frames between with only the background showing. That makes the frame flash on and off.

It would be nice if you showed the end result here 🙂
Thanks for the tutorial
So i want to combine flashing letter while words scrolling by. I know how to do both but can’t figure out how to combine them as one image. A video tutorial would be great or any Tut at that..thanks