
I’m a Photoshop guy in a Photoshop world. Pretty narrow minded outlook, but that is how I’ve operated for quite some time, and quite contentedly. I’m constantly getting requests through my website for add-ons and material for Photoshop Elements, but have always turned those people away, as I had adopted the attitude that ‘Elements is NOT Photoshop, therefore I do not ‘DO’ Elements’. I wasn’t aware of what an ignorant web I’d entangled myself in… that is, until recently.
A few weeks ago, my good friend Richard Lynch (author of ‘Using Photoshop 6’ and webmaster-mind of http://ps6.com) brought up Elements in an email conversation. My first thought was that he was joking, but it soon became apparent that he was totally serious. After a few more emails, my interest was piqued and I rushed to the local Staples store and picked up a copy of Photoshop Elements. Boy, was I surprised.
What I had passed over as a simplistic, basic editing program is a far more powerful tool than I’d given it credit for. In fact, many of the functions available to Photoshop 6 users are included with Elements, including all the filters. Some items have been omitted which I miss… in particular the Curve adjustments and Channels. But this program is no lightweight, so let’s take a quick look at some of the features I find particularly interesting.
When you open Elements, you will see several items docked in the bar along the top.
![]()
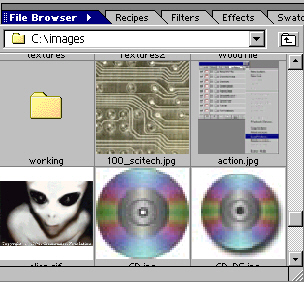
To begin, we have a File Browser. I find this incredibly convenient, as wish that this were included in the full version as it makes finding those image files you lost very easy to locate.
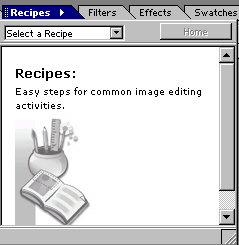
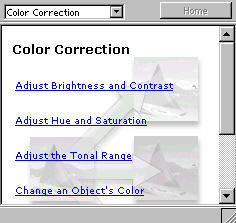
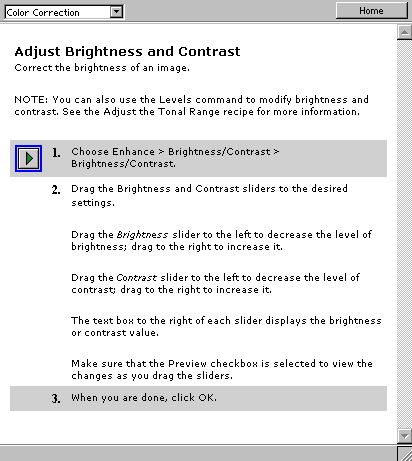
Next on the list are Recipes. In short, these are simply HTML pages that can be viewed right inside the program as tutorials. When you open the Recipes Palette, you see a drop down menu at the top from which you can select the effect or process you would like to learn.
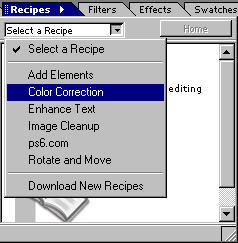
Once you select the tutorial, you will get a series of links with all the tutorials on that subject. Click on the specific tutorial, and a page with the step by step process for that effect springs into view.
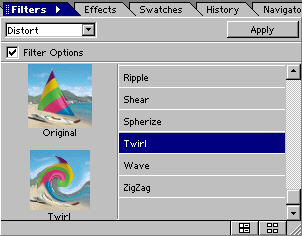
The next in line is a Filters pop-up. Though you can access the filters the conventional way, this particular window gives you an added advantage in allowing you to see thumbnails of the image if the filter is run… sort of a before-after effect.
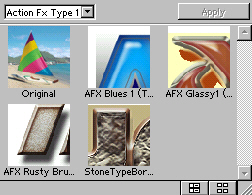
The Effect Palette is the Elements incarnation of Actions in Photoshop 6. Though you cannot create/save new actions from within Elements, you can still apply existing pre-recorded effects to your image.
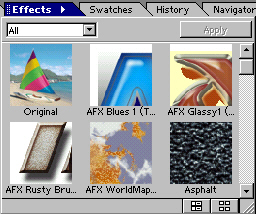
Again you are given a drop down menu with several categories of Effects, and once selected thumbnails of those effects are loaded into the palette. Simply click on the effect, choose ‘Apply’ and the effect is applied to your image.
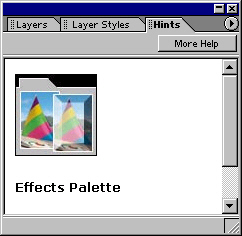
One other item that I find to be an excellent tool, especially if you are on the learning end of the curve, is the Hints Palette. Selecting any of the other folders causes a set of Hints to appear for that palette. Very cool!
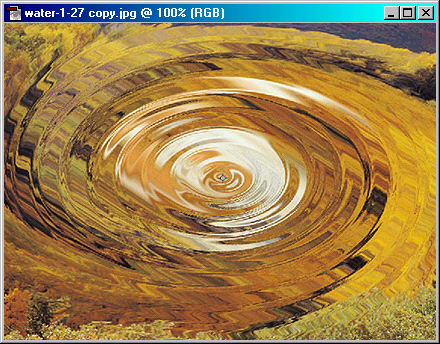
To close, I thought I would go through the tutorials I covered here over the past 2 weeks, but use Elements instead of Photoshop. Here are the results:
Glass Sphere:

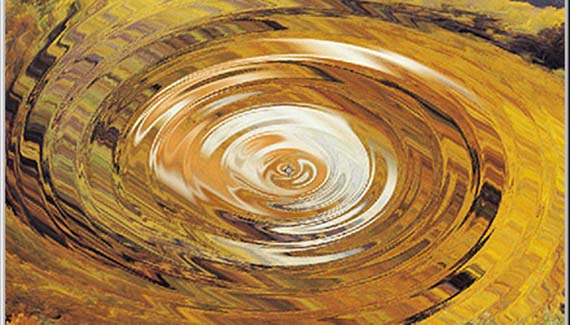
Water Ripples:
Though not as beefy as it’s big brother Photoshop, Elements is still a force to be reckoned with.
See you next week!
