
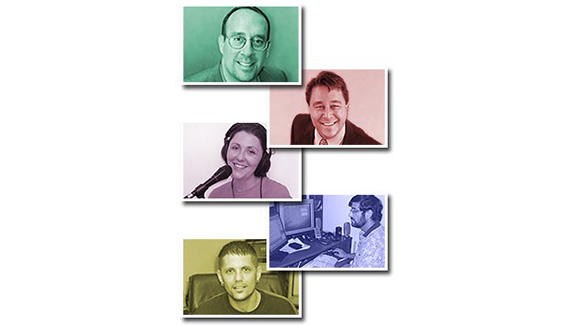
I always suggest using pictures of people on every brochure, flier and web site my clients have, regardless of their products. It makes any marketing material more personal. On the other hand, plugging in a headshot can look forced, so we’re often looking for a way to put a twist on posed shots. Here’s one that’s simple and flexible, what I call a rainbow collage.
You’ll need five typical headshots that are the same size. Start a new Photoshop file that’s about 2 times wider and since this collage uses five pictures, make it about 6 times taller. You can always crop it to the final size when finished.
Next, in the individual picture files, drag the picture layer to the new collage file. You can close each file once you have its picture in the collage.
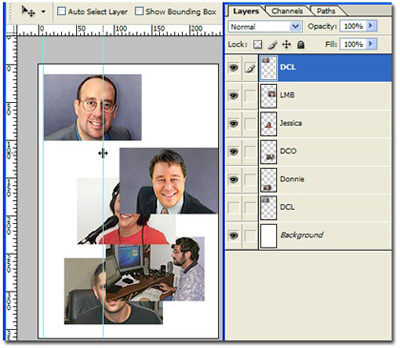
In the collage, rearrange the layers so the first picture is in the top layer, the second picture is in the second, layer, etc. If rulers are not turned on, press Control-R (Windows) or Command-R (Mac) and drag a guide from the left ruler to a position just inside the left edge of the image.
Move the first picture so its left edge is on the left guide. Then drag another guide from the left ruler and place it about two thirds across the first picture.
Move the second picture so its left edge is on the second guide, and move it down so the first picture covers its top left corner. Do the same with the third picture but align it with the first guide and finish with the fourth and fifth pictures so the positions are similar to the example.
Click on the layer for the first picture.
We don’t want to use any color from the picture, so press Shift-Control-U (Windows) or Shift-Command-U (Mac) to desaturate it. This leaves a black and white image that gives us light and dark areas. Later we’ll color it.
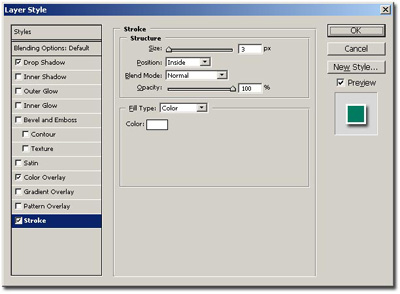
We want to add three effects: drop shadow, stroke and color overlay. On the layer palette double click the right side of the first layer to bring up the layer effects dialog box. Click the Drop Shadow effect. In this case, the default settings work, but you can change them to your taste.
Next, click the Stroke effect. In the Stoke dialog box, click the color, choose white and click OK. For this web example, change the settings as shown. Higher settings may be needed for high-resolutions images. It’s important to change the Position setting to “inside” so the corners are sharp. Other settings leave rounded corners.
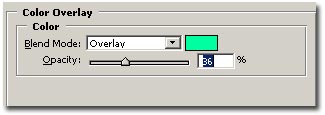
Now comes the fun part, playing with the color. Click the Color Overlay effect. Click on the color and choose whatever color you like. The first picture in the example uses the RGB settings 39, 255, 161. Click OK. Change the blend mode to Overlay or Softlight. The best choice for the mode depends on the color selected and the balance of light and dark shades in the picture. You can experiment, but I’ve found that Overlay or Softlight work best. Then adjust the opacity until you like the effect. Click OK.
With the first layer’s effects list showing, click the word “Effects” and drag it to just below the second layer to copy the layer style. The drop shadow and stroke are the same for each picture. The only things that change are the color, blend mode and opacity for the Color Overlay effect. On the second layer, double click the Color Overlay effect to open the dialog box and choose a different color and tweak the opacity.
Repeat these steps for the rest of the pictures. Once all the pictures are colored, you can go back to any layer to tweak the color, blend mode or opacity of the effect.

Dave Loebig is a graphic designer, writer and instructor in the Tampa area. You can contact him at BrandonBusiness.com.
