
This technique is written for Photoshop CS6, but can easily be accomplished in prior versions.
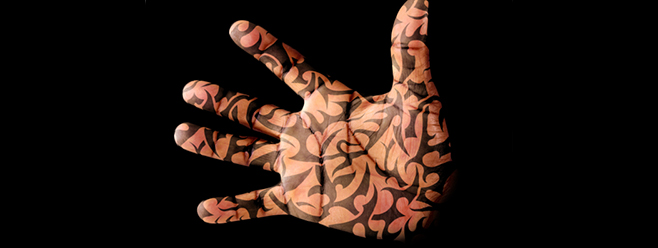
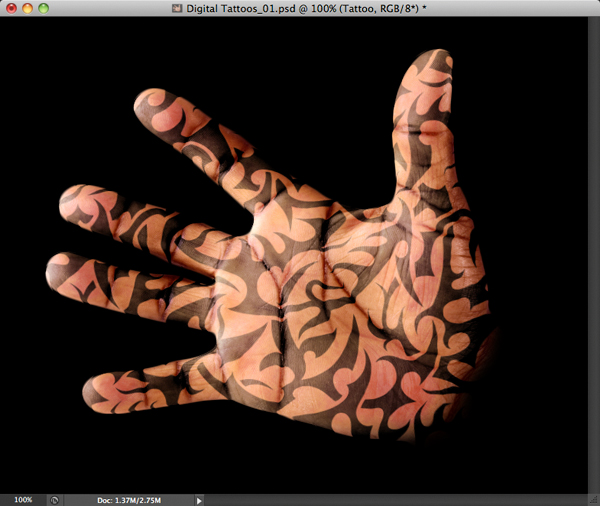
I recently picked up a copy of the Michael Jordan biography, Driven from Within, and on p. 11 there is a striking photo of a tattooed palm that immediately grabbed my attention. I liked what I saw so much that today's tutorial is dedicated to creating the same tattoo effect with less mess and a whole lot less pain. We'll do it digitally using Photoshop's amazing blend and distort tools.
(Readers may download the iStockPhoto files used in this tutorial by clicking here. The files are for personal use only.)
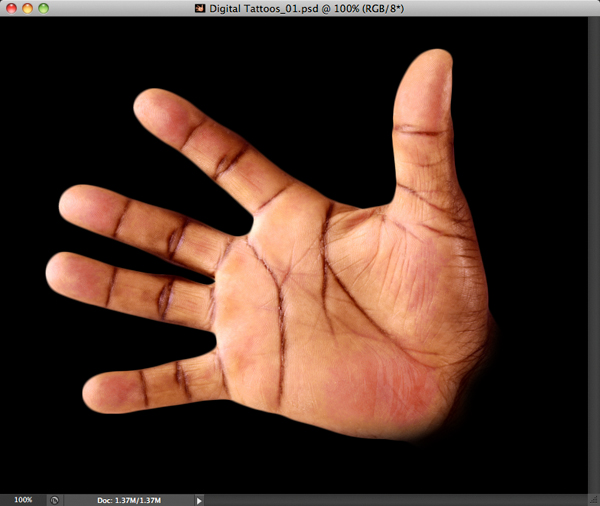
Step 1: Open a Skin Photo
Open a skin photo to which you'd like to apply a tattoo. Feel free to use the sample palm image.
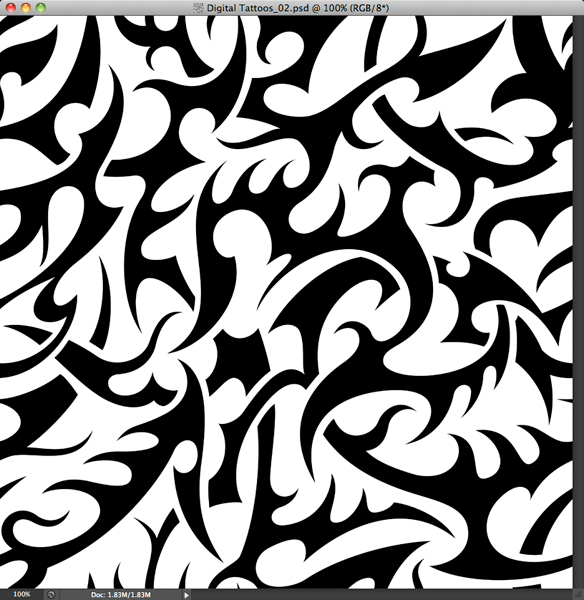
Step 2: Open a Tattoo Photo or Illustration
Open a photo or illustration of a black tattoo on a white background. The provided sample file is part of the vast iStockPhoto collection. Since it's a seamless pattern, it can be tiled to cover a photo of any dimension.
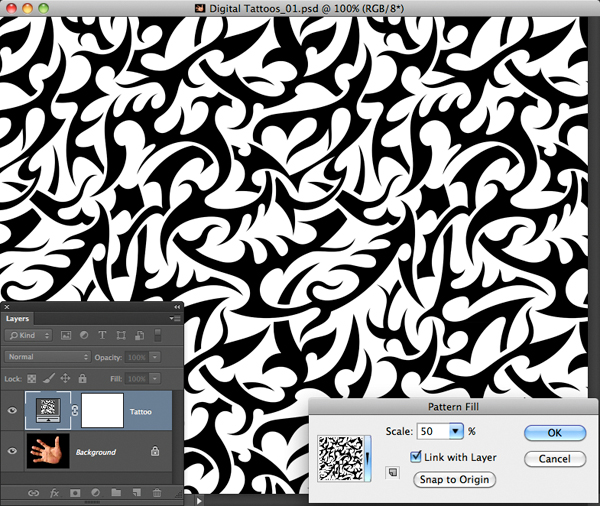
In order to tile the pattern seamlessly, we'll first need to define it as a pattern. Choose Edit>Define Pattern. Name it "Tattoo" and press OK. Close the file.
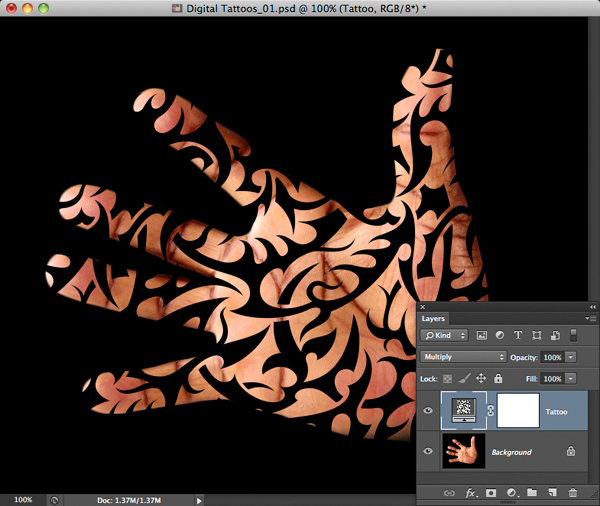
Step 3: Apply the Tattoo
Return to the palm photo and choose Layer>New Fill Layer>Pattern. Name the layer "Tattoo" and press OK. Scale the pattern to 50%.
Press OK. To blend the tattoo with the palm, we'll cycle through the blend modes. Activate the Move tool. While holding Shift, tap the + key repeatedly until the tattoo blends with the skin. Since the skin is light and the tattoo is dark, Multiply blend mode works best.
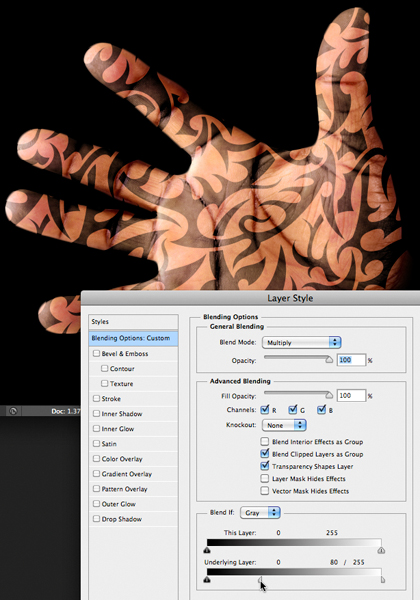
Note: In this example, the background and the tattoo are black. Therefore, the tattoo does not appear beyond the edges of the skin. If it did, you would need to make a selection of the hand, invert it, activate the "Tattoo" layer's mask thumbnail and fill the area around the hand with black.
To add additional authenticity to the tattoo, we'll allow some of the highlights and textures of the hand to pop partially through the tattoo using the Blend If sliders. Choose Layer>Layer Style>Blending Options. Since we're trying to pop through highlights from the underlying hand layer, grab the Underlying Highlight slider and begin dragging inward. Notice how the tattoo tears away. To create a more natural blend, reset the Underlying Highlight slider, hold Option (PC: Alt) and drag the left half of the slider until the blend looks authentic.
Press OK.
Step 4: Add Distortion
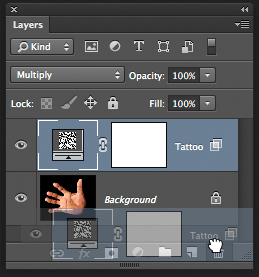
To complete the look, we'll bend the tattoo to the contours of the hand using a displacement map. To accomplish this, we need to create a duplicate of our document that will serve as the displacement map. Choose Image>Duplicate. Name the duplicate file "Displace" and press OK. In the Layers panel, drag the "Tattoo" layer to the trash icon at the base of the panel.
Since a displacement map must be comprised of shades of gray, choose Image>Adjustments>Desaturate. A slight boost in contrast will help the mapping feature. Choose Image>Adjustments>Levels. Drag the Input Highlight and Shadow sliders inward to add contrast to the palm.
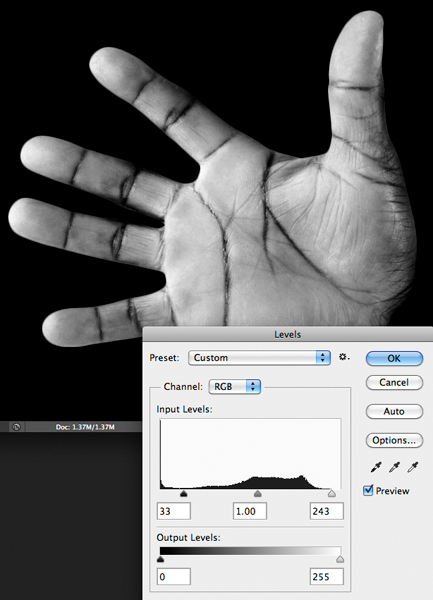
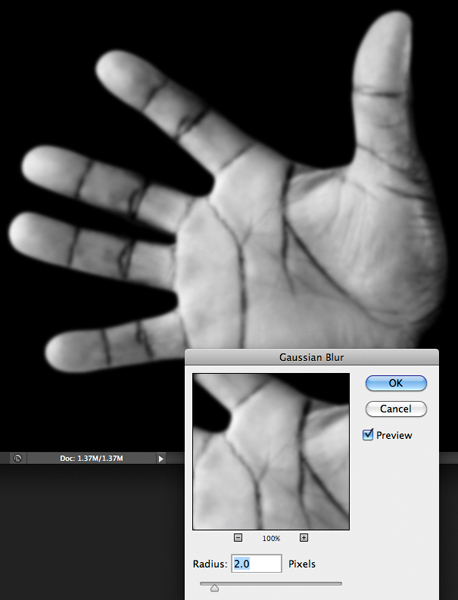
Press OK. Since our goal is to realistically bend the tattoo into the major creases of the palm, but not to bend it into the fine texture of the skin, we'll blur the displacement map enough to remove the fine texture. Choose Filter>Blur>Gaussian Blur. In this example, a 2-pixel blur does the trick.
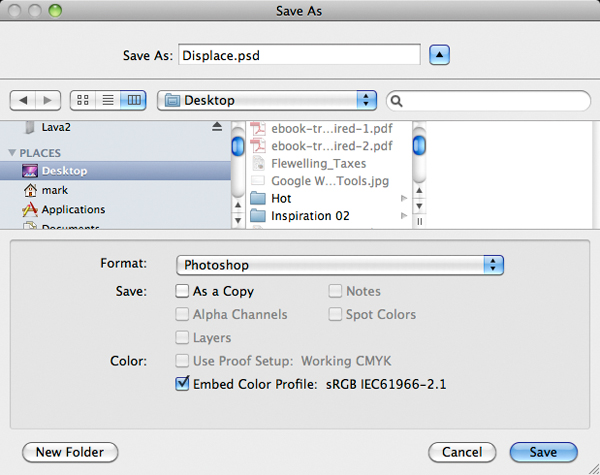
Press OK. Choose File>Save, place the file in a memorable location, and set the file format to Photoshop (.psd).
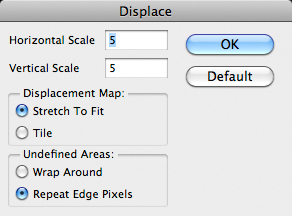
Press OK. Close the file. Now we'll apply distortion to the tattoo. With the "Tattoo" layer active, choose Filter>Distort>Displace. When an alert dialog appears, press OK. The amount of scaling will vary based on several factors, so you may have to experiment, undo, and try again. In this example, Horizontal and Vertical Scale values of 5 work well. Set the Displacement Map option to Stretch to Fit and the Undefined Areas option to Repeat Edge Pixels.
Press OK. Locate the "Displace.psd" document that you saved a moment ago.
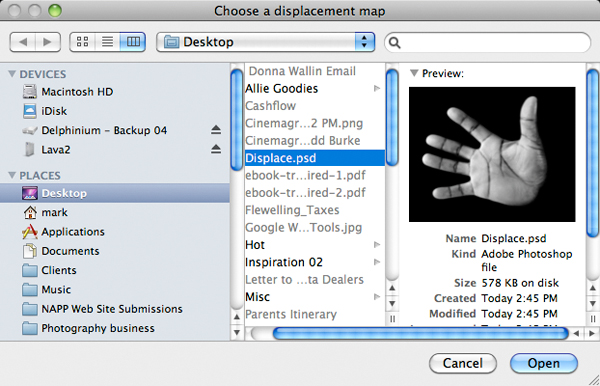
Press Open and watch as the tattoo bends naturally into the creases of the palm. Wow! To better see the result, tap Command-Z (PC: Control-Z) several times.
Mark S. Johnson Photography
msjphotography.com

cool!
I know Photoshop. I apply the same command as you brief this tutorials. It is very nice tutorials for beginners and expert. http://www.biswasbd.com/graphics/photoshop/online-photoshop-use-history-brush-tool-in-photoshop.html
I’m not that much of a online reader to be honest but your blogs really nice, keep it up!
I’ll go ahead and bookmark your website to come back in the
future. Many thanks