
Photoshop CS6 public beta preview introduced some great new vector design workflows. This walkthrough will cater to some of those designer and graphic workflow and improvements.
Visit Adobe Labs to download your own copy of Photoshop CS6 Beta.
Vector Layers replace Shape Layers
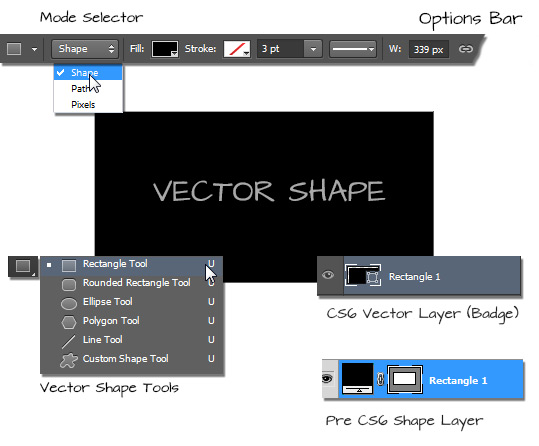
Notably the biggest improvement into CS6 is the replacement of the standard shape Layers with the new Vector Layer workflow. The tools are the same, its just the mode of operation has been rewired akin to the way Illustrator creates and handles vector objects.
Select any of the vector shape tools (or the Pen Tool) from the main toolbar then go to the Options Bar and from the Mode Selector dropdown list choose Shape.
Once a Shape Tool and Mode Selector is in place click and drag directly onto your document to create a simple shape. As captured below I created a shape using the Rectangle Tool with a default Fill of Black. Notice the new Layers Panel vector layer thumbnail badge compared to earlier versions.
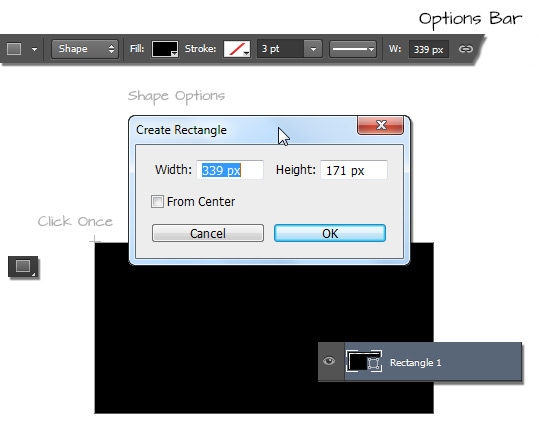
Another method of creating a vector shape is to simply click once, anywhere in your document. A shape options dialog will appear with the geometry options for the corresponding shape tool. Click OK to commit shape creation and it will appear at the crosshair cursor position.
If you enable From Center then click, the cursor location will map to the center reference origin of the shape.
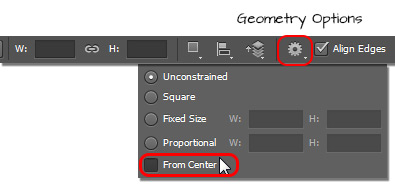
Note: If you opt for the From Center option in the Shape Options dialog just remember that the property is sticky. Meaning if you later attempt to click and drag (manual method) to draw a shape it will continue to draw From Center. To turn it off simply select the Options Bar geometry settings icon and deselect the From Center option.
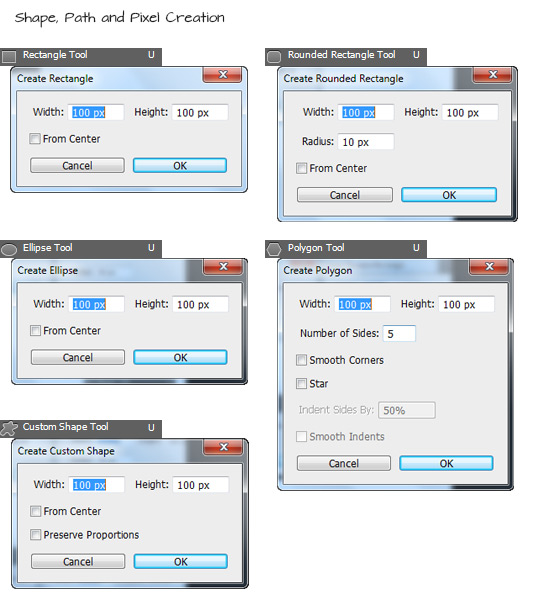
Shape, Path and Pixels Dialogs
Except for the Line Tool all other shape tools, regardless of mode selector choice (Shape, Path, Pixels) share similar geometry dialogs when you click directly onto the document. You can see the respective tool Create dialog options captured below. Each of these reflects the same geometry options found on the Options Bar for the respective vector shape tool.
Toggle Shape Path Outlines
To toggle the visibility of the vector shape path outlines, select the Path Selection Tool click away from the vector shape; click directly onto the vector shape to re-activate the shape path outlines. Or to conserve on clicks you can resort to the Enter/Return keyboard shortcut to toggle the visibility of the active vector shape path outlines.
Command/Ctrl + H is another method of toggling the vector path outlines. However it also toggles the visibility of other onscreen visual aids like Guides, Slices, and Color Samplers etc.
Vector Fill and Stroke
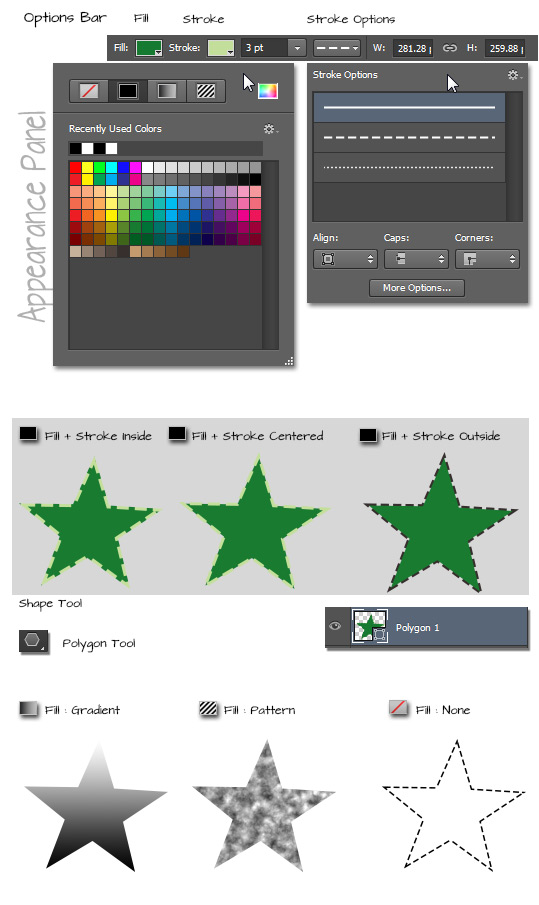
Brand new to CS6 is the Fill and Stroke options workflow with vector shape layers. Simply draw a vector shape layer using your tool of choice. Then configure the Options Bar Fill and Stroke appearance property.
Both the Fill and Stoke appearance panel share a similar configuration with options to set the active vector object appearance to None (No Fill/Transparent), Solid Color, Gradient or Pattern.
The Stroke Options panel is similar to the one in Illustrator with configurations to set the Align, Caps and Corners as well as a choice of stroke preset and to save a preset to the collection (from the More Options button command).
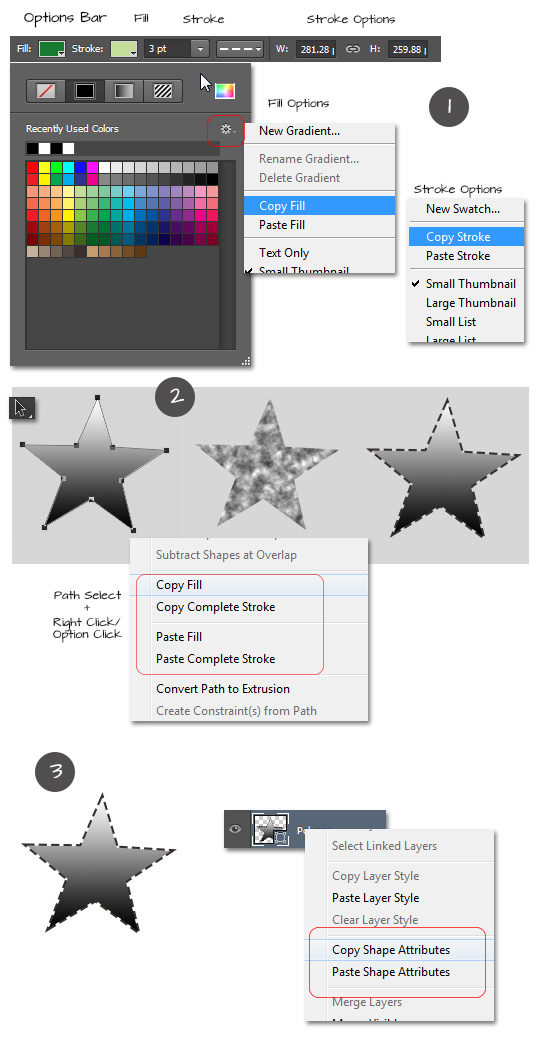
Copy/Paste Fills and Strokes
To reuse a current vector shape appearance (Stroke/Fill) properties onto another vector shape you can resort to the following workflow procedures.
1. From the respective Appearance Panel (Fill or Stroke) choose the Options icon command and from the context list choose Copy/Paste Fill/Stroke.
2. When a vector layer is active with the Path (or Direct) Selection Tool(s), Right Click/Option Click and from the context menu list choose the respective attributes operation: Copy/Paste Fill or Copy/Past Complete Stroke.
3. When a vector Layer is active from the Layers panel Right Click/Option Click and from the context menu list choose Copy/Paste Shape Attributes.
Option three above (Copy/Paste Shape Attributes) has the added advantage that you can copy and paste BOTH the Fill and Stroke attributes from one vector Layer to another, while the first two options isolates the copy/paste of the Fill attribute from the copy/paste Stroke attribute.
Note: You can still create the old Solid Color, Gradient and Pattern Adjustment Layers by going to the Layer > New Fill Layer and choose the respective menu command option. They are also available via the New Fill or Adjustment icon command located at the bottom of the Layers Panel.
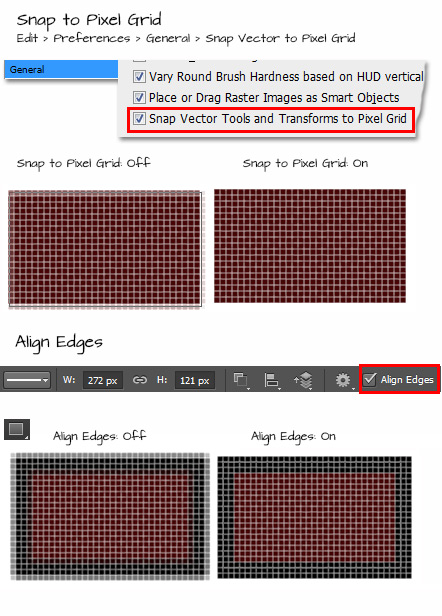
Snap to Pixel Grid and Align Edges
These two new options offer pixel precision when working with vector shapes and paths.
Snap to Pixel Grid (enabled by default via the Preferences) will align a vector shape path and anchor points to the pixel grid. As captured below (top) you can see a slight offset of the path outline away from the pixel grid; compared to alignment of the path outlines to the pixel grid when the option is enabled.
Align Edges (also enabled by default via Options Bar for Vector Tools) will remove anti-aliasing along a shapes vertical and horizontal edges and adjusts them to the pixel grid. As captured below (bottom) when disabled you will see anti-aliasing along the outer edges compared to the crisp/sharp edges snapped to the pixel grid when the option is enabled.
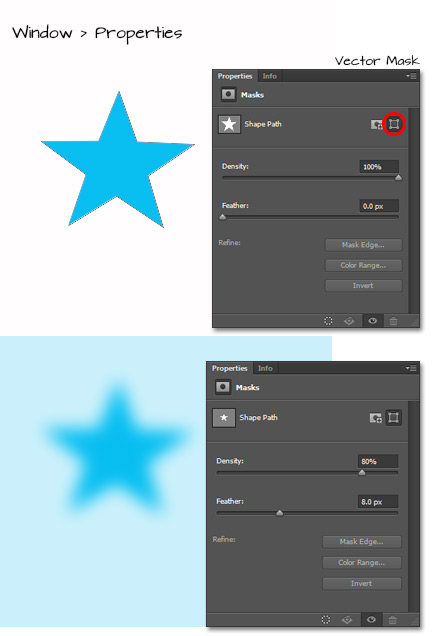
Vector Masks
Vector Masking can now be applied via the Window > Properties Panel. Click the Vector Mask icon (encircled in red) and adjust the Density and Feather properties for the active vector shape layer.
Until next week
Happy trails
http://www.heathrowe.com

“Select any vector shape tool…” When I select the rectangle tool as you instruct and change the mode to Shape, it does, in fact, create a rectangle simply by dragging in the image area, thanks. The thickness of the lines of the rectangle mimic the settings in the Options bar, currently three points. However if I select the line tool and drag with the same three-point setting in the Options bar the line drawn (after dragging out a line with the line tool) is only about half-a-point thick! Is there some easy way to draw a three-point line?