
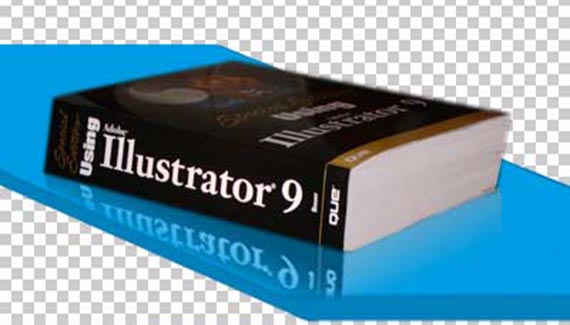
Adding a reflection can change the appearance of a surface dramatically. Rather than a flat, boring surface, you can give the illusion of shine or polish. And it can be as easy as one-two-three.
We’ll start with a photo of a real object on top of a fake surface. To give the surface the illusion of reflectivity, we’ll reproduce the sides of the book on the blue surface.
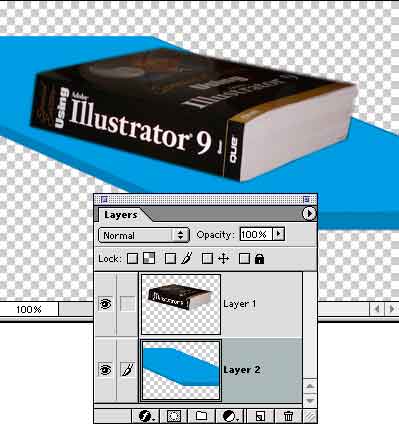
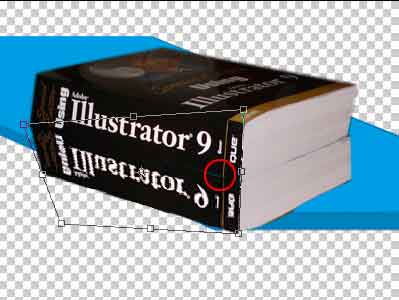
Make a selection of a part of the object that should appear on the surface. Command-J/Control-J copies that selection on to its own layer.
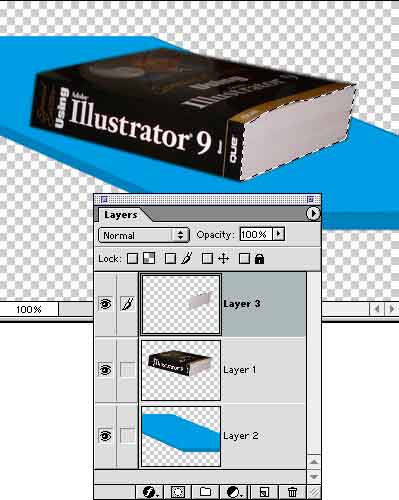
Edit> Transform> Distort allows us to reposition and flip the new layer. (There’s no need to make a selection first. Because the pixels are on a separate layer, Photoshop will assume that you want all of the layer.) Start by dragging the top center anchor of the bounding box down past the bottom center anchor. That flips the “reflection.” Next, position the reflection by dragging corner and side handles. Sometimes it helps to move the point of transformation (the crosshairs in the center), but beware of distorting too much.
Press Return/Enter when done. Repeat for any other parts of the object that need to be reflected. Notice in the book’s spine the thin line. It needs to meet at the point circled in red.
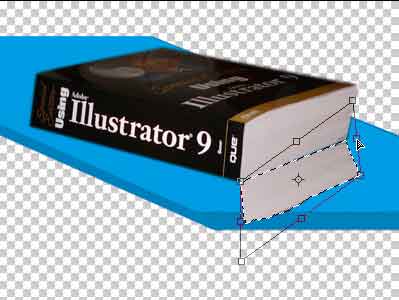
We’ll use Quick Mask mode to help fade the selection. In the Layers palette, Command-click (Control-click) on the active layer. Press Q to enter Quick Mask mode. Drag a black-to-transparent gradient from the base of the reflection (where the reflection and the object meet) to the other side of the reflection.
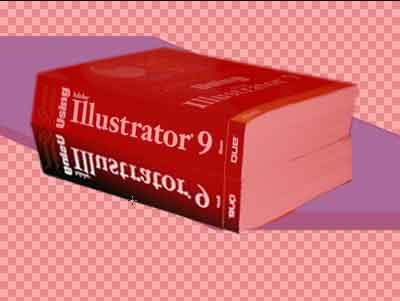
Exit Quick Mask mode (Q again) and hit Delete/Backspace to clear the selected area. Repeat for any additional reflection layers. (Note: make sure that you change the active layer in the Layers palette.)
Once that’s done, you can erase any unwanted areas of reflection. In this case, we want to remove parts of the reflection that fall off the edge of the surface.
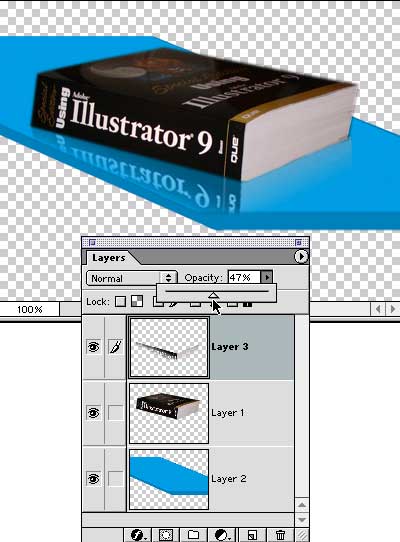
Next we can merge all the reflection layers into one using the layer palette’s menu command Merge Down. reducing the opacity of the reflection layer allows the surface to show through, finishing the illusion.

FINALLY a SIMPLE tutorial that explains what I wanted. (Creating Basic Reflections) Do you know how many HOURS I searched the net for something just like this? Most sites assume you know these basic things and go right onto advanced techniques.
Thanks for the help. It goes a long long way in making my graphics look that much more professional. I have now bookmarked your site so that I can visit again and again.