
It’s happened to most of us at one time or another. We drag a layer from the layers palette to the window of another image to copy it and –surprise!– it’s WAY too big. Here’s a way to make sure that doesn’t happen again.
When you drag a layer from the Layers palette on to the window of another image, the layer is copied (actually, its pixels are copied) to the second document. Holding down the Shift key, by the way, centers the layer when pasted. If the images are of substantially different pixel dimensions, the pasted layer is either too large or too small.
[NOTE: Don’t think in terms of “inches” and “resolution” when discussing image size within Photoshop. When you’re moving between or among images in the program, you’re dealing strictly with pixels. An image that’s 4×6 inches at 300 ppi is, inside Photoshop, actually 1200×1800 pixels.]
To copy from a smaller image to a larger image, Shift-drag the layer from the source image’s Layers palette to the window of the destination image. Then use Edit> Transform> Scale and re-size the layer. Drag a corner anchor of the bounding box to enlarge. You can hold down the Shift key to preserve the width/height relationship (“constrain proportions”) as you scale. Holding down the Option/Alt key scales from the center, increasing the size in all directions. You can most certainly use both Shift and Option/Alt at the same time.
Moving pixels from a larger image to a smaller image –without losing pixels– takes a bit more work. But with this tip, it’s a piece of cake.
–Open the destination image, go to Image Size, and check the image’s pixel dimensions. Write ’em down if necessary.
–In the source image, drag the layer you want to copy to the New Layer bottom of the Layers palette to copy it.
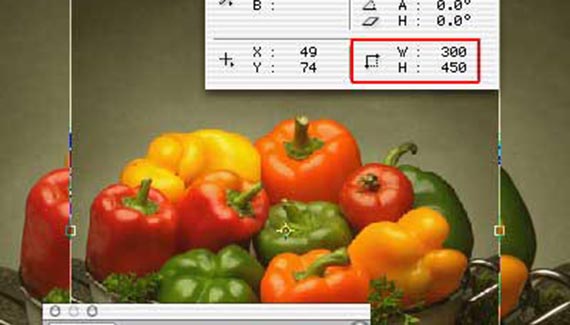
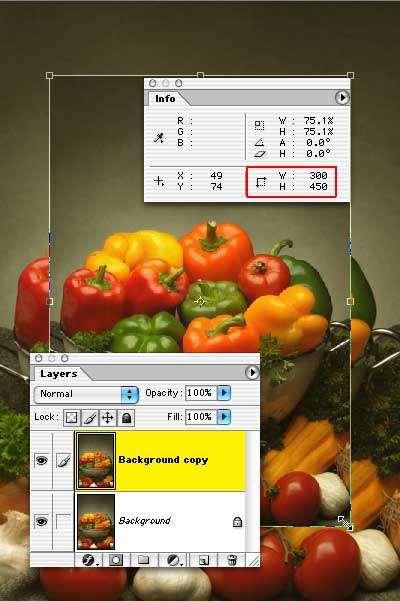
–Make sure the Info palette is visible.
—With the duplicate layer active in the Layers palette, Press Command-T (Mac) or Control-T (Windows) to enter Free Transform. A bounding box will appear around the outside of the layer.
–Hold down both the Shift and Option/Alt keys and drag one of the bounding box’s corner anchor points inward. Keep the mouse button down.
–Check the Info palette. When the W (width) and H (height) fields show your target pixel size, release the mouse button and then the modifier keys. (The W and H fields are shown in the red box in the following image.) Hit the Enter or Return key to accept the change and exit Free Transform.
–Drag the layer from the Layers palette to the destination image, using the Shift key to center (if desired). You can now delete the transformed layer from the source image.

thxs a million
How can i have it to when I I paste into Photoshop I can do something quicker than the free transform to have it fit the dimensions of my document. I don’t need place as I am cutting pieces of one image and needing to scale them to fit a template. I’ve tried automate>fit image and that does not work either. Any help would be appreciated.